
Sewing a dress may appear to be a difficult task, but even those who are new to sewing can do it using machines for making clothes! Dresses are actually fantastic starter projects if you choose a simple style and a fabric that is straightforward to work with. These beginning sewing gun machine tips can assist you in making a dress.
The secret to making a dress is to think of it as a collection of pieces and how to tie off sewing stitch in the end. Each component may contain numerous steps that are sequentially ordered and build on one another. You continue on to the next component after finishing one and closing stitch sewing, and your dress will be finished in no time.
When you’ve finished stitching a seam (or reached the end of your thread), how to knot a stitch is crucial to the long-term longevity of your job. Whether you are sewing a dress, a pillow, or a shirt, you must know about how to end sewing knot. There are different ways as how to tie a stitch whether you are hand sewing finishing stitches or with a machine, some ways works better than others. Are you nervous? Well don’t be!! This article will help you to know different ways to how to end a stitch. Keep reading this article till end.
How To Finish a Stitch– Right Tool and Material
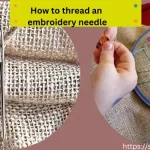
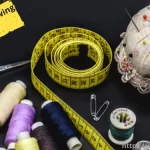
You’ll need to choose the right materials, such as your needle and thread, before you start your project. You can use a needle guide and a sewing thread guide after you’ve chosen the right cloth for your project.
How to tell the size of a sewing machine needle or type of needle to be used in a project? Well, Sharps are the most common hand needle, and all-purpose thread is suitable for a wide range of applications. If you’re working with a very thick or heavy material, such as leather, you’ll need a special needle and thread.
How To End a Stitch By Hand
How to end sewing by hand-Simply create a loop in the previous stitch you made and draw the needle through it if you’re sewing by hand. Pulling tightly will result in a knot that secures the finish stitch. On a machine, finish a stitch is even easier: just create a few backstitches and clip the thread! Anyways we are going to discuss different methods for tying off the stitches.
Tools To End the Stitch by Hand
Method 1: Double Thread Tying Off
Follow these simple steps to tie off stitch by hand.
- Finish your row with the last stitch. how to end a thread when sewing-Leave a few inches of thread hanging at the end. This is everything you’ll need to tie your knot.
- Separate the two threads at this point. Bring one thread over the other and under the other.
- Only pull hard enough to get the threads to the fabric’s edge. If you tug too hard, the stitches will pucker. The first part of your first knot is here.
- Step 3 should be repeated, this time tightening the knot.
- How to tie an end knot, After that, I prefer to tie at least one more knot. Some even go on to make two more.
- Cut the end of your thread after closing stitch .
Method 2: Tying Off Double Thread With Backstitch
This is the second and easiest way to tie off the knot. sewing tying off with double thread is a good practice and my mother always use to say that it is better to sew with double thread to make it more secure. Follow the following steps to end the stitch.
- Tying off a stitch requires to Tie the two sections together by cutting the thread just below the needle. If you have a lot of thread left over, leave a 2-3-inch tail to make the knot easier and end knot sewing.
- Usually, I tie three knots. My grandmother did as well. I have no particular rationale for this other than the fact that three seems to be the optimum number.
- Tighten the first knot of hand sewing finishing stitches all the way down to the cloth, but no further! If you pull the first knot too hard, the stitches will be overly tight, causing the fabric to pucker. You can tie 2nd sewing finishing knot incredibly tight after the first!
Method 3: Tying Off Double or Single Threaded Needle Without a Knot
This third method is tie off sewing with either single or double thread without knot. This is an excellent way to tie off without knotting! This method can even be used to anchor your thread before starting a stitch.
- I don’t use this very frequently (because to my tendency to sew in the manner in which I was taught), but it is a powerful and reliable approach to secure your closing stitch.
- When the seam is pushed flat, this method of anchoring the thread is a little more noticeable than a knot, so try to keep this form of tying off the finishing stitch little in the seam allowance if you can!
- How to tie thread after sewing? Make a very little stitch (this stitch should go through both layers of cloth!) and draw the thread through at the end of your line of stitching.
- Replace the needle and go through the same stitch again.
- A loop will form as you pull gently on the thread.
- Start pulling with your needle through the loop.
- Continue pulling until the loop is completely flattened. Cut the tail end off and you’re finished to secure hand stitch!
Method 4: Tying Off On Felt
How to sew end of fabric – This fourth method is ending the stitch by tying off on felt. If you want to try this method just follow the following steps and tie a knot with us.
- You’ll want to hide the thread end when you tie off on felt. You’ll be stitching straight stitch by hand with felt most of the time, and the stitches will be visible!
- Tie a normal knot (like the one I demonstrated with a single thread) and tuck it as close to the felt as possible.
- Bring the needle back out in the center of the felt, sewing a hole closed to the knot. Make sure the needle is in the middle of the two felt layers!
- To tighten the thread, pull it and clip it with scissors.
- When you release the thread end, it will shrink back into the felt. BOOM! Thread ends are hidden, and a tight knot is tied.
- Let’s move on to pressing, pinning, and cutting textiles now that we’ve covered stitching with needle and thread, knotting the thread, and tying off!
Method 5: Leave a Few Extra Inches
Did you think there are just four methods to end strong stitches for hand sewing? Absolutely not!! There are still some other methods like this double thread method. Follow these steps to tie off thread.
- How to finish embroidery stitch? Finish your row of stitches, leaving a few extra inches at the end, for the following method of terminating your stitches.
- Then, near the end of your final stitch, you’ll bring your needle down through the fabric once more as sewing finishing knot. Leave a loop instead of pulling it tight.
- Bring your needle back up to a point near where it went back down through the fabric. Thread your needle through the loop you created earlier.
- Leave a smaller loop if you pull too tightly. Bring your needle through the loop one last time and pull it tight. Cut the end of your thread and here is your most secure sewing stitch.
Method 6: End The Stitch By Cutting Extra Thread
You can tie the knot or end the stitch by cutting extra thread and turning your fabric over in basic needle and thread sewing. This is a very easy method to follow. Just follow the following steps to end the stitch.
- Turn your fabric over and trim the excess thread.
- how to tie a knot at the end of thread- Cut tight to the knot you just formed using a pair of sharp scissors. Because you won’t see this side of the fabric, it’s fine if a little thread sticks out from the stitch.
- Then, turn the fabric over to show your stitches.
- If you trim close to the sewing knot end, it won’t loosen over time because you pulled the knot tight to finish stitch.
What’s the best way to finish run stitch embroidery?
You’ll turn the cloth over so that the backside is facing you, just like the first way. This site will display any knots you tie. This is advantageous because it is not the front and will give the front a better overall appearance. To crocheting with embroidery thread ,construct a loop, slide the needle under the nearest stitch and draw it in.
To make the knot more secure, repeat the technique and tie the thread through another loop. Trim the excess thread until it seems tight enough, and you’re done! To make a clean cut, make sure you have a sharp pair of scissors. This is the ideal source for a clearer visual representation of these instructions.
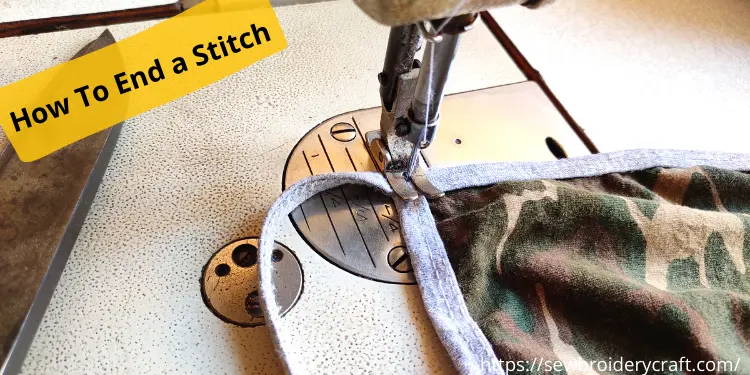
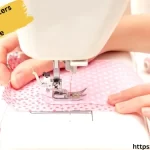
How To Secure a Stitch With Sewing Machine
Stitching in hand Sewing is the art of improving the appearance and functionality of your clothing. When it comes to sewing machines, there are numerous advantages to using them for various tasks. Different styles of sewing are used for different sorts of stitching. When you first have a stitching machine to make clothes, it’s only natural that you’ll need to learn how to use it so that you can stitch better.
There are many stitches to master on your sewing machine like babylock vibrant, and an how to end a stitch is one of the most crucial, as every other stitch will be incomplete without it. It is one of the most important stitches for finishing or locking the stitch. It holds your lock stitch by hand in place and prevents it from opening.
Learning how to secure a stitch with sewing machine is critical. This article will teach you how to use an end stitch on a sewing machine, as well as other useful information.
How To Secure a Stitch with Sewing Machine- Tools And Materials
Method 1: Lockstitch
Are you new at sewing or stitching? Need some help on how to end sewing by hand ? You have come to the right place. If you are using sewing machine for sewing your dress and hand lock stitch or want to end the stitch, you should try this simple method of lockstitch. Follow these steps and end the stitching.
- Sew three to five stitches ahead, then stop for a lockstitch.
- Reverse those three to five stitches with your reverse stitch knob, then stop.
- To achieve secure ends, sew over those stitches once more.
Method 2: How To Sew End of Fabric
How to sew something together- Stitch all the way to the end of the fabric is another method to finish a stitch.
- Release the reverse sewing hand button and sew over the stitches you just made with a straight or zigzag stitch.
- Continue sewing until you reach the fabric’s edge. Your stitches are now securely fastened.
- To finish a stitch, three lines of thread will overlap at the end of your fabric.
Method 3: Built-in button
Ending the node with machine is much easier than sown or sewn it by hand. Machines make it much easier as they offer built-in functions for ending the stitch. A lockstitch button is available on several sewing machines. This button automatically sews a lockstitch for you, so you don’t have to hand lock stitch, reverse, and sew again. Some more advanced machines, allow you to program lockstitches into stitch sequences. Just press the button and vallah here you go its done guys!!
Method 4: End The Machine Stitch Manually
How to end a stitch in embroidery-You can finish your row of machine stitches by hand if you wish. This method is the easiest and you just have to follow two steps to end the stitch.
- When you’ve finished your row, clip the thread and leave a few inches to tie off.
- When hand stitching, thread a needle and loop stitch sewing and use one of the methods indicated above to finish stitches.
Ending the stitch while working with a ribbon
Working with a silk ribbon can be some time tough because it keep slipping through hands. There are some methods that can help you to end the stitch while working with the ribbon. These methods will make it easy for you to make silk ribbon’s flowers etc.
Method 1: Secure it with thread
How to tie thread after sewing-This approach is suitable for all ribbon widths, although it is especially suggested for wide silk ribbons (7mm and 13mm width). Stitch the tail of the ribbon to the back of the fabric with tiny stitches using sewing thread that matches the background fabric and an embroidery needle (see photo on the left). If you’re using two layers of cloth to support your ribbon embroidery, pierce only the bottom layer so the threads holding the tail in place are hidden from view. If you’re only using one piece of cloth, make sure the stitches are concealed beneath the front embroidery.
Method 2: Tying the Knot
There are just three steps to end the hand sewing finishing stitches when working with a silk ribbon.
- Pass a blunt point of your needle under the previous stitch on the back of the fabric where the eye is, leaving a loop.
- Finishing with a knot After that, pass the needle through the loop. Silk ribbon embroidery is finished with a knot
- Gently tighten the loop, pushing the stitches on the back with your finger as you pull to avoid ruining them on the front.
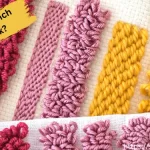
Ending the Stitch While Working With Crochet
Running stitch knitting is another activity that involves producing and designing fabrics. Finishing knot: another technique, same difficulty. Okay, it’s not a major issue. Still, it’s the finishing touch that makes your work almost faultless and professional. You should only have one loop on your hook once you’ve finished your crochet running stitch last stitch. Pull the thread through the loop after wrapping the yarn around the hook when doing running stitch crochet. Continue to pull the remaining yarn until it is taut in crochet sewing in ends.
This will cause a knot to form in embroidery on crochet. You can withdraw the hook once you’ve become used to this action and ensured that the crochet is secure. Crocheting may be easier than to close knitting end since the thread is thicker and easier to handle. All you have to do now is make sure you have enough yarn to finish it, and the rest should be simple.
Final Thoughts
These are a few ways on how to finish a stitch. Because we know that they are all relatively distinct from one another and use different approaches, you can pick the one that best hand sewing finishing stitches you needs. Choose how to tie a stitch option that will provide you with the best results without causing you any harm or regret.
In this article, we attempted to address how do you end a stitch related all of your concerns, questions, and concerns including how to finish sewing by sewing machine. Now you must be able to know how to tie off a stitch by hand. It’s critical to complete your stitches properly. Your stitching will come undone if you don’t secure how to end a stitch, undoing all of your hard work. It takes practice to learn how to end a hand stitch. Try a couple different approaches to discover which one suits you best. If you have any additional questions or know of any additional approaches, please leave a comment below and your queries will be answered.
FAQs
Here are some frequently asked questions about ending a stitch. If you have further questions just contact us, we will try to help you.
Leave a Reply