
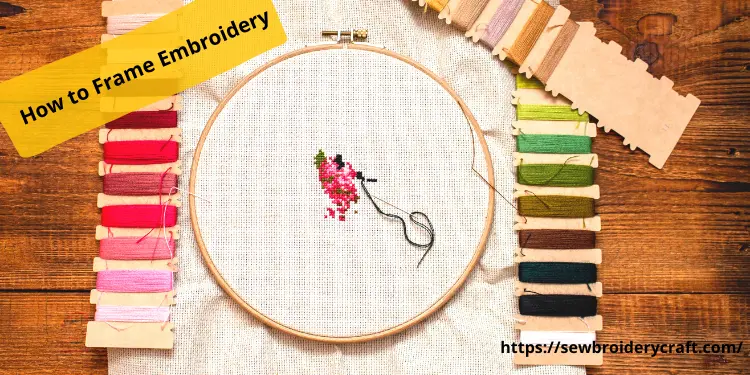
Many of us spend countless hours affectionately stitching the latest embroidery patterns that are soothing for the soul. Most of the people frame embroidery it in the hoop when they sewed it completely. There are several options on how to display embroidery, and framing is one of them. how to frame an embroidery by using different methods. If you are looking for the best ways of framing embroidery, then you are at the right place. Today, we are going to give you the best ideas to frame embroidery designs so that you can easily display them on your walls and give a charming effect to your space.
Best Methods: How to frame embroidery pieces
There are many ways on how to frame finished embroidery, but we will give you the top-notch and most preferred embroidery framing ideas that provide another level of charm to your embroidery design. Embroidery designs can be used as art, and you can put them on the walls of your home or place them on the tables like a photo frame. There are two exceptional methods on framing an embroidery piece given below that help you frame your embroidery art perfectly that enhance the beauty of your art.
Frame For Embroidery Hoop
When it comes to how to frame needlework, many experts suggest to keep things simple. So, the first and the foremost method that has been used is framing embroidery in a hoop. When you place hand embroidery designs in a wood hoop, they appear fresh and modern. How to use an embroidery hoop as a frame is also more straightforward than you think.
In a hoop, you can finish hand embroidery in various methods that appears to be embroidery round frame. This solution appeals to us because it avoids the need for adhesive while keeping it simple when you are worried about what to put embroidery on? The benefit of not using adhesive is that you can easily remove the cloth from the hoop if you need to clean or reframe it later. Follow these instructions to get a stunning display embroidery result every time.
Required Tools & Material:
- Wood embroidery hoop
- Pen or chalk pencil
- Felt sheet big enough to cover the hoop
- Scissor
- Embroidery floss and needle
Steps To Frame Embroidery In A Hoop
1. Wash And Iron The Fabric
Although your hand stitching embroidery pictures may appear clean on the surface, oils from your hands are likely to have accumulated on the fabric while you are stitching, or embroidery sketching marks can also be absorbed in the cloth. So, washing and ironing the fabric is crucial in this process. Wash the fabric perfectly so that no dirt or stains remain on it otherwise your framed embroidery art would look so ugly. Then leave it to get dry. When the fabric is dried, you have ironing embroidery so that your hand embroidery frame design looks fresh, neat and clean.
2. Cut backing Fabric
Now to prepare embroidery frame for wall , you have to cut your backing fabric as per the size of your embroidery hoop. You have to remove the hoop or embroidery board you are using to frame your embroidery work for that purpose. Cautiously learn how to block crewel embroidery before removing the hoop from fabric. Then place the inside ring on a piece of the fabric you want to measure and mark at the fabric as per the ring’s exterior with a pen or chalk pencil. Now cut the fabric in a circular manner and set it aside until its ready to mount embroidery.
3. Put Embroidery Fabric in the Hoop
In ways to display embroidery, Place the hoop’s inner ring on a table or another flat surface, it is crucial to learn how to keep fabric tight in machine embroidery hoop, specifically. Now place your pressed and dried cross stitch in such a way that it Face-up on top of the ring. Then you have to place the outer ring on top of the finish embroidery design and also make sure that the screw is centred at the top of the design.
Take your time to perfectly make all the necessary adjustments finishing the back of embroidery to get the design exactly where you want it. Once you have got the design where you want it, pull the fabric taut but not so tight that it distorts the design or your wish as how do you display embroidery. Then tighten the embroidery hoop’s screw. Trim the excess fabric around the hoop in a circle, leaving about a 1-1/2 inch margin as finishing an embroidery hoop.
4. Gather the fabric
At this step of displaying embroidery, you have to stitch the fabric left at the back of your embroidery hoop. For how to finish back of embroidery hoop purpose, you have to thread your needle with embroidery floss or heavy-duty sewing thread. Then sew a running stitch around the circular approximately 1/4 inch in from the fabric’s edge. You have to make running stitches that should be 1/4-1/2 inches long for the stitching frame .Once you have returned to the start of the round sewing frame, then remove the needle from embroidered frame.
Pull the thread ends gently together; this will pucker the cloth and hold it tightly as time goes on. Continue to pull slowly and gently until the fabric lies flat, it is similar to backing fabric for hand embroidery. Then correct the folds toward the center as needed. You have to tie them together in a simple knot to secure the ends of the fabric. You need to follow the same procedure on how to frame cross stitch in hoop.
5. Place the felt backing on top.
How to finish the back of an embroidery hoop: This would be the last step in which you have to stitch the backing of your embroidery hoop. Take the backing fabric we cut in step 2 of framing piece. Then place it on the back of the hoop. Now sew it with another piece of embroidery floss and your needle. A blanket or a little whip stitch can be used for this purpose. To make the stitches disappear, use a thread that is the same colour as the fabric or use a contrasting thread as a design feature. Now, look at the framed embroidery design. It will soothe your soul, and you can hang embroidery hoop in any place you want. In this way, you can easily display embroidery design on frame embroidery hoop
How to frame embroidery without hoop
Framing an embroidery piece embroidery hoop is casual, but you can also frame your work in a square, or circle rectangular embroidery hoop frames to get a more sophisticated look. You can take your picture to a local framer or do it yourself at home using a photo or box frame.
Required Tools & Material:
If you want to follow this text, you will need the following supplies:
- Picture frame.
- Crafts knife.
- Cardboard (1.5mm thick).
- Needle and sewing thread.
- Cutting mat.
Steps To Frame Embroidery Without Hoop
1. Get Perfect Frame Size
The first and foremost step is to get the frames for embroidery. You have to choose the size where your embroidery design can be easily framed. Because you get the smaller or larger size embroidery frame, it would kill the main purpose of this task. You will not be able to get the desired results and ruin both your time and money. Always keep in mind the size of your embroidery design, and then choose the perfect size and design to frame embroidery.
2. Disassemble The Frame
Once you get the perfect size embroidery frame, you have to take it apart from the frame. Glass or acrylic protection will be used as per the frame’s needs. For example, ribbon embroidery is a two-dimensional design that must be framed in glass fronted display frame. However, if your stitching is flat enough, no protection will be required to deal with the dusting issues.
3. Trace And Cut The Cardboard
At this step, you have to measure the cardboard size on which you will easily place your embroidered design. You have to get it as per the size of your frame. Place the back of your round sewing frame or rectangle embroidery hoop frame on the cardboard, then mark it with the help of a marker. Then cut the rectangle with a craft knife and ruler while working on a cutting mat.
4. Place Your Embroidery Design
You have to take the fabric on which your embroidery design is finished and put it on the cardboard or for foam check embroidery foam vs craft foam details first. This will increase the width by a few millimetres. Don’t worry; it’ll still fit in the frame if you make sure the cardboard isn’t larger than the real backing.
5. Mount embroidery
After placing the embroidery designs frames size fabric on top of the cardboard, you have to save the fabric’s position by folding the edges beneath the cardboard and securing it using paper clips or stitchery tape. You have to do this embroidery stretch frame so that no wrinkles are left on the fabric, which makes the design look so ugly.
6. Fold The Corners
Put them upside-down for this purpose, and then fold the corners of the fabric. To get diagonal creases, fold each corner at 90 degrees, then each side at 45 degrees. It’s okay if the folds are not perfect; simply, you have to pull them close enough together and stitch with an invisible stitch or push pin embroidery design. Your embroidery art is now placed in the right place.This step is crucial if you have circular frame for embroidery. However, the sides are still loose, so we’ll deal with them in the next step.
7. Lace The Sides
People wonder how to lace cross stitch for framing? Well let me tell you you have to lace the sides together using a needle and sewing thread to give a more neat appearance to every embroidery project. You have to pull the thread as tight as possible without bending the cardboard. If your embroider cloth can fray easily, then you have to strengthen the edges before lacing them to get the perfect results.
8. Finishing Touch
Now you have to place the frame on the backside. Position the glass or Perspex in it and press the mounted cardboard firmly into place. In this way, you will easily frame your embroidery art and now can place it in any area of your home, whether it is on the wall or on the table like a photo frame as ideas for finished embroidery.Hope it will clarify all about how to frame finished embroidery.
Conclusion
This is all about how to frame an embroidery to enhance their appearance. We tried to give our best to provide you with the best embroidery framing ideas, and we hope that this text will be beneficial for you. But if you still don’t understand how to frame embroidery, then you can post a comment and tell us the problem you are facing. We will try to give you the best possible solution regarding your issue.
Leave a Reply