
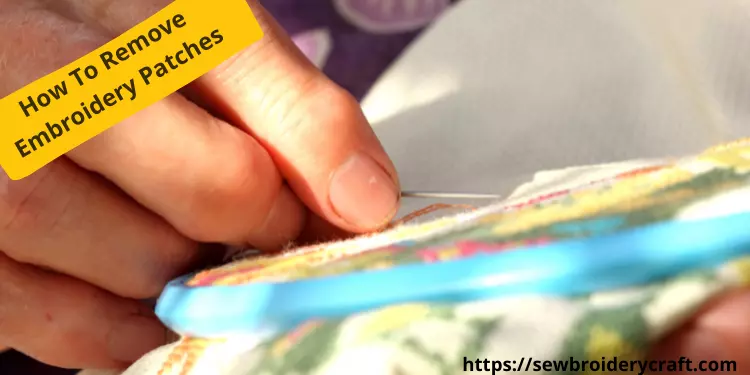
It’s compulsory to learn how to perform different embroidery tasks on clothing. Nevertheless, it’s also essential to master how to take off an embroidered patch. Most people don’t know how to remove embroidery patches from shirts and clothes properly. In this comprehensive guide, I will share all the necessary details about removing embroidery from shirts without damaging the clothes.
Furthermore, embroidery is not only about decoration; it’s more than this. In actuality, it’s an incredible skill to make designs using thread, needle, and yarn. In this article, we will not discuss clothing type because our primary point of concern is embroidery patch removal and its different methods that are dependent on fabric type and quality. Let’s discuss different useful ways of removing embroidery in detail.
Why Remove Embroidery?
Can you remove embroidery? Yes! You will need to remove embroidery when you make an error trying to stitch some favourite designs. To beware of starting everything again, it’s better to remove the only error part created so far. Not only that, sometimes you want to have some new logo on your t-shirt, and removing embroidered logos will be helpful at that time. Maybe you don’t like the logo’s color or want to make it fancier.
In the same way, you spot the error after completing the design when you are a beginner at embroidery so is it possible to remove embroidery and do it again. If you have made any mistake and are thinking about how to take embroidery out, your next task is to remove it without damaging the garments.
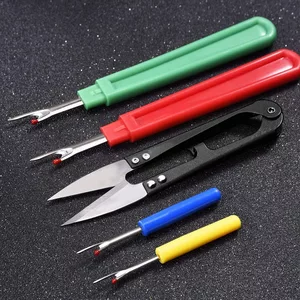
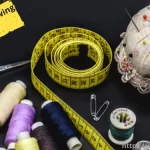
Important Embroidery removal tools
Will removing embroidery leave holes, well! you will find tools for patch removal, but not all are necessary and sufficient enough. For your assistance, we have shared a list of significant tools for removing embroidery patches.
- Seam Ripper.
- Magnifying glass.
- Duct Tape.
- Tint Brush.
- Embroidery Eraser.
- Other tools (Optional).
How to Remove Machine Embroidery
It’s a fact that learning how to remove stitching from clothing with machine-sewn embroidery threads has great tension ,and is a bit challenging to remove because of tight stitches and backing. In fact, dealing with bobbing stitches and embroidery with backing is more difficult than simple ones. Just follow the steps mentioned below as a best way to remove embroidery properly.
- The first step in how to unstitch embroidery is always simple, just turn the cloth inside out and lay it on a flat surface. Bring some light to illuminate and remove monogram
- After completing the first step properly, pick up a seam ripper and start cutting the stitches. Don’t forget to eliminate bobbing stitches and only cut 5-6 stitches simultaneously or embroidery stitches will leave holes.
- How to remove embroidery with backing! Utilize some high-quality stabilizers to maintain the tension in the threads. It not only helps you get the threads properly cut but also avoids any fabric damage. When completed, flip the shirt or cloth again and pull the cut threads with tweezers, this is how to remove an embroidery patch.
- This method has one additional step where you have to use duct tape to eliminate extra pieces. Duct tape is pretty easy to use, and place it on the shirt. Another benefit of this method, how to take embroidery off is that it’s a good alternative to a seam ripper. You can do the same process with the help of duct tape.
How To Remove Embroidery Patches Using An Eraser
With the advancement in the embroidery field, experts have introduced how to remove embroidery from scrubs with another tool known as Embroidery Eraser. It’s a handy tool and looks like a man’s beard trimmer. You can use it for hand-sewn and machine-sewn embroideries. Nevertheless, don’t forget to keep the cloth stretched for hand-sewn embroidery. Let’s take a look at the easiest way to remove embroidery with an eraser.
- The first step to undo embroidery is always simple, just change the side of the shirt or cloth and place it on a horizontal surface. Make sure the fuzzy texture does not appear.
- Check out all the embroidery edges and set the embroidery eraser- embroidery remover all across the edges. Make a movement sketch in mind and push it slowly.
- Move the eraser across the segments and make sure all the threads at the edges have been cut. Always use a certain light under a lamp to see the threads properly.
- So, it’s all about how to get embroidery out aided with embroidery stitches.
How To Get Rid of Stitches Marks After Embroidery Patch Removal
It’s a common question will removing embroidery leave holes, the fact is that the stitches left small holes behind after embroidery patch removal. Is there any solution to this problem? Don’t worry! The finest and easiest way to eliminate such spots is to iron the shirt or cloth properly. If some marks remain, use fingernails to scrape them correctly. Repeat this task for a few minutes in both vertical and horizontal directions and also redo ironing. It will surely remove all the thread marks from the area you remove machine embroidery.
How to Remove Embroidery Stitching– Hand-Sewn
How to undo embroidery-Hand-sewn is pretty simple and easier than other machine-type embroidery designs. The reason is that they are less tight compared to machined stitches. For how to take embroidery out, make a decision whether you want to remove the whole patch or only a part of it. Let’s move on to the stitches removal steps:
Step 1: Turn The Cloth Inside Out
For How to remove a patch from a shirt, turn the t-shirt or the cloth inside out to visible the back stitches. Place it on some flat surface from where you want the shirt patches embroidery stitches out. Arrange some proper lightning to see the stitches clearly. It further protects the fabric from any damage.
Step 2: Remove Stitches via Seam Ripper
It’s necessary and helpful to use a seam ripper to make the stitches apart from each other. Use it correctly and adequately without hurry, and think, will removing embroidery leave holes when using seam ripper if you eliminate 5-6 threads at a time. Make sure all the stitches are gently pushed to cut them properly to remove embroidery.
Step 3: Turn The Cloth on True Side
After ripping the stitches and completing one section, turn the cloth to the right side to get the best embroidery removal services. Bring a tweezer and pull all the cut stitches out. While doing to remove embroidery from the jacket, you will feel some resistance but push them gently to prevent any damage. If you feel more resistance, try to find out the cause and resolve it by flipping the cloth again.
It’s all done how to remove embroidery stitching hand-sewn embroidery. Let’s discuss other methods in detail.
Final Words
In conclusion, How To Remove Embroidery Patches looks like a piece of cake, but it’s not. You need a proper embroidery removal tool and best way to remove embroidery-follow steps to eliminate them from shirts or clothes. We believe our shared easiest way to remove embroidery and other details will help you to remove embroidery patches properly without any trouble.
Enjoy Embroidery Patches Removal!
Leave a Reply